

certbot 을 이용해 Let's encrypt SSL 인증서 발급받기
nodejs + express 로 구성된 API 서버앞단에 nginx 웹서버를 올려두었습니다. 멀티 서버 구성을 위해 포트 포워딩 방식을 적용해서 LightSail AWS 서버 하나에서 모든 웹 서버들을 구동시키고자 이 구성을 도입했습니다. 기존에 운영하던 서버에서는 아파치와 톰캣으로 멀티 서버를 구성했었는데 이미 한번 해본 경험이 있다보니 어렵지 않게 구성을 완료하였습니다.
nginx 웹서버는 이미 셋업이 되어 있다는 가정하에 인증서 발급을 위한 절차를 진행해줍니다.
아래 명령어를 통해 certbot 을 설치해줍니다.
letsencrypt를 설치해주면 certbot도 자동으로 설치가 된다고 하는데 certbot만 따로 설치해줘도 됩니다.
sudo apt update
sudo apt-get install letsencrypt 또는 sudo apt-get install certbot
version 을 확인해보면 certbot 1.12.0 버전이 정상 설치되어 있는 것을 확인하실 수 있습니다.
bitnami@ip-0.0.0.0:/etc/nginx$ certbot --version
certbot 1.12.0
nginx 웹서버를 위한 인증서 발급을 진행해줍니다.
아래 과정을 거치면 인증서 발급을 자동으로 진행하면서 nginx 서버 설정 파일내 경로까지 자동으로 잡아주게 되어서 매우 편리했습니다.
sudo certbot --nginx
다음과 같은 오류를 만나면서 더 진행이 안됩니다.
The requested nginx plugin does not appear to be installed
추가적인 모듈 설치가 필요한데 아래 명령어를 통해 python3-certbot-nginx 를 설치해줍니다.
sudo apt update
sudo apt install python3-certbot-nginx
이제 다시 발급 절차를 진행하게 되면 아래와 같은 질문들을 받게 되는데 적절하게 입력해주거나 Y를 눌러서 계속 진행해주시면 됩니다.
Enter email address (used for urgent renewal and security notices)
: 본인 이메일 주소를 입력해주시면 됩니다.
Please read the Terms of Service at
https://letsencrypt.org/documents/LE-SA-v1.3-September-21-2022.pdf. You must
agree in order to register with the ACME server. Do you agree?
: 약관에 동의해주시면 됩니다.
이후 물음에도 Y 로 답해서 진행해주시면 최종적으로 아래와 같이 인증서가 발급이 됩니다.
fullcahin.pem, privkey.pem 두 파일이 아래 경로에 위치하게 됩니다.
인증서 유효기한은 24년 1월 8일까지 90일이 주어집니다. 90일이 지나기 전에 인증서를 갱신해주면 되며 certbot renew 명령어를 사용하라고 친절히 안내되어 있습니다. 스케줄러를 통해 자동 배치 스크립트가 돌 수 있도록 셋팅이 필요하겠네요
Congratulations! You have successfully enabled https://내도메인
- - - - - - - - - - - - - - - - - - - - - - - - - - - - - - - - - - - - - - - -
Subscribe to the EFF mailing list (email: 내메일주소).

IMPORTANT NOTES:
 - Congratulations! Your certificate and chain have been saved at:
   /etc/letsencrypt/live/내도메인/fullchain.pem
   Your key file has been saved at:
   /etc/letsencrypt/live/내도메인/privkey.pem
   Your certificate will expire on 2024-01-08. To obtain a new or
   tweaked version of this certificate in the future, simply run
   certbot again with the "certonly" option. To non-interactively
   renew *all* of your certificates, run "certbot renew"
 - If you like Certbot, please consider supporting our work by:

   Donating to ISRG / Let's Encrypt:   https://letsencrypt.org/donate
   Donating to EFF:                    https://eff.org/donate-le
sites-available 폴더 내 설정 파일에 ssl과 관련한 설정이 자동으로 추가가 되어 있습니다.
site-available 와 site-enabled 두개의 폴더가 있는데 site-available에서 작성된 default 파일이 site-enabled 에 심볼릭 링크되어 있는 구조입니다. 그래서 site-available 에 있는 설정 파일만 편집하시면 됩니다.
//etc/nginx/sites-available/default 파일 내 서버 설정

server {
	server_name 내도메인

    location / {
    	proxy_pass http://localhost:8080
    }

    listen 443 ssl;
    ssl_certificate /etc/letsencrypt/live/내도메인/fullchain.pem;

    ssl_certificate_key /etc/letsencrypt/live/내도메인/privkey.pem;

    include /etc/letsencrypt/options-ssl-nginx.conf;

    ssl_dhparam /etc/letsencrypt/ssl-dhparams.pem;
}
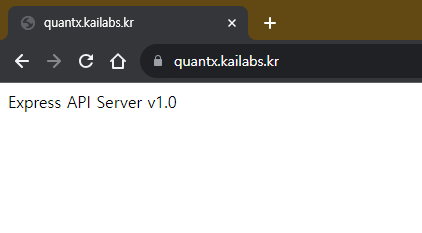
여기까지 진행 후 nginx 서버와 express 서버를 재기동 시킨 뒤 브라우저를 통해 접속해보면 경고 없이 https 로 접속이 되는 것을 확인하실 수 있게 됩니다. 이 연결은 안전합니다라는 메시지가 안정감을 주네요
sudo service nginx restart

그리고 하단에는 기존 도메인에 대해 https 보안접속으로 리다이렉팅 시켜주는 부분이 있습니다. www 에 대해서도 리다이렉팅 시켜줄 수 있도록 www.시작하는 본인 도메인 정보가 잘 설정되어 있는지 확인이 필요하니 참고하세요
//etc/nginx/sites-available/default 파일 내 서버 설정

server {
	server_name www.test.co.kr test.co.kr

    location / {
    	proxy_pass http://localhost:8080
    }

    listen 443 ssl;
    ssl_certificate /etc/letsencrypt/live/내도메인/fullchain.pem;

    ssl_certificate_key /etc/letsencrypt/live/내도메인/privkey.pem;

    include /etc/letsencrypt/options-ssl-nginx.conf;

    ssl_dhparam /etc/letsencrypt/ssl-dhparams.pem;
}

server {
    server_name www.test.co.kr test.co.kr;
    listen 80;
    return 301 https://$host$request_uri; # managed by Certbot
}